Apple Search Ads 101: Starting out
“Those who fail to plan are planning to fail.” — Benjamin Franklin
These are pretty daunting words but they carry a certain amount of weight especially when it comes to a successful marketing strategy. This is the first post in a series of educational blog posts we have designed to help you the developer, advertiser, or agency get the most out of your Apple Search Ads campaign.
Just like with an iceberg, the parts you can see on the Apple Search Ads console only tell you part of the picture. A large number of concepts and definitions get used ubiquitously so make sure to reference the glossary
Setting up
While having some prior experience in ad campaigns and terminology gives a marketer a bit of a head start, the basic framework of Apple Search Ads is fairly straightforward. ASA is broken up into search results campaigns and search tab campaigns.


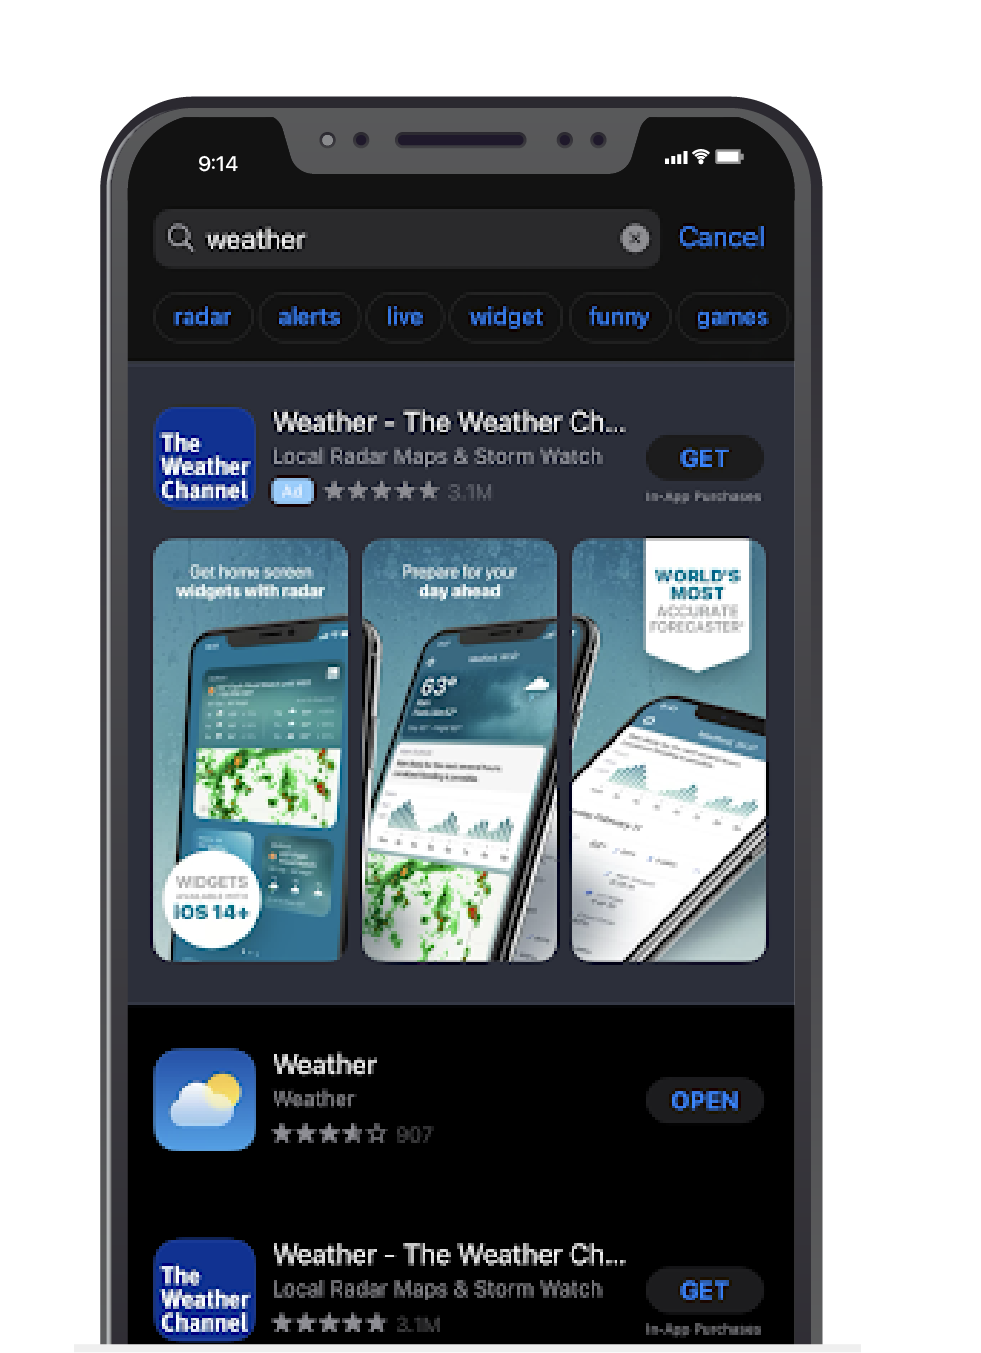
Search results campaigns control bids for certain keywords and audiences that are used by potential customers in the Apple App Store search results page. If you win the bid for the keyword searched for, your app will show up first. These are available in both Basic and Advanced plans but differ in the amount of control you have.
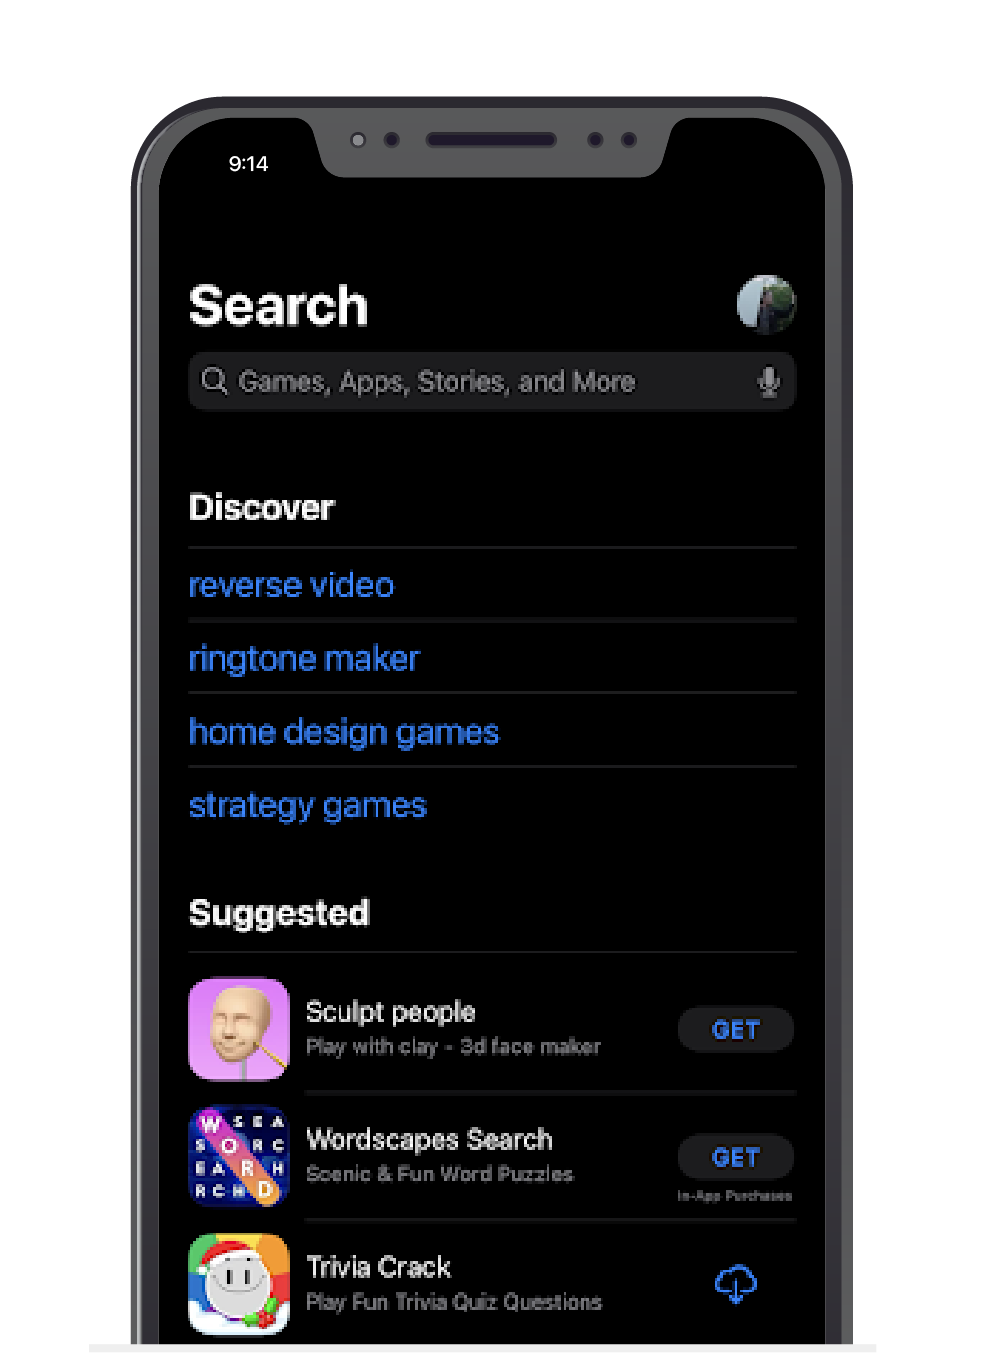
Search tab campaigns control ads that show up on the actual search page under the “Suggested” section before the user has typed in any keywords. The creative for these is lifted from the assets you’ve already uploaded to your App Store product page and features your app name, icon, and subtitle. Search tab campaigns are only available in the Advanced version.
Basic vs Advanced
Apple Search Ads plans start with a Basic Version which caps your monthly ad spend at $10,000 per app per month and has no ability for keywords and audience refinements.To create your ad, Apple scrapes your app’s metadata for content to promote your ad so you will need to make sure it’s representative of what you want.
For starting developers, the Basic plan could be a decent start although as your spend increases, you run the risk of having a larger cost per install (CPI) in the crowded marketplace. While you only pay for the installs you get, you’re in competition with every other developer on the Basic and Advanced plans. Therefore, you will always be increasing your ad spend just to keep up.
Still, spending time on the Basic plan gives you an opportunity to improve some of the foundational elements of your app. The metadata of the app could be off and reach customers in searches who aren’t interested. Your creative screenshots might not be eye-catching or they may be confusing to people so the title and subtitle could be more descriptive. Now is the time to note what other apps come up with the category or keywords your app is in. Find, what we are going to call now, your “organic” competition.
Apple gives you $100 of free credit in Apple Search Ads for new accounts, which is useful for experimenting with the platform. While the Basic plan gives you fewer options to experiment with, you could start with a simple $5 daily cap on an install budget and see what happens. Keep experimenting and improving your basic marketing goals until you hit that $5 daily ad spend so you know when it’s time to move on to something more advanced.
The Advanced Version is where you can start targeting specific audiences and keywords for our campaigns. The ASA calls these segmentations ad groups.” You can combine these ad groups with your campaigns and then layer those ad groups with different groups of keywords for bids. Ad groups can be reused in multiple campaigns so you can target the same audience in different campaigns and different keywords. There is also the ability to control your spending at the campaign level so you can increase spend on more effective audiences. The Advanced version has no maximum monthly budget so you can go beyond what you were spending in the Basic version and also more effectively.
What you are charged for changes with Advanced. With Basic, had a CPI price model, but you will now be charged for taps (clicks) and also per thousand impressions. This enables you to be smarter with your spend, but you will need to be constantly on top of your campaigns as high-value keywords can quickly eat up your daily or monthly spend.
Now that you can target specific audiences, you need to make sure that you are showing your ads to the searches that you know are going to be more inclined to download our app. Let’s say you had a home maintenance app that was designed to help with home repairs. You can target an audience in the 25-40 age range since they will be more inclined to own a home. Also, regional differences in language can be important. If your app had the word “Color” in it, you could target the keyword “Colour” in the UK.
To really understand the power of the Advanced solution, look at how you can now structure your campaigns. Campaigns are broken down into four different categories based on how you want to use them to improve performance and allow you to scale more effectively.
Brand vs Category vs Competitor vs Discovery
The Brand Campaign is designed with a focus on capturing and protecting your brand position in the marketplace. You don’t want competitors to out-bid you using your own app name or search terms directly related to them. This is probably where you should spend your first efforts as it’s going to lead to the most installs per tap. You will want to keep your keywords on an “exact match” type meaning Apple will only accept bids from this campaign for the specific keywords you attach to it.
Category Campaign is broader than the Brand Campaign as now you are working on conquering the vertical channel your app lies in. If you have a gaming app, you will want to start being competitive with more general terms like “game”, “card”, or “solitaire.” This allows you to reach a much larger audience than the Brand Campaign so you will want to keep your audience selection broader. Of course, you will need to still use exact match types and make sure each of these terms is still related to the app. You get charged per tap and impressions now, not installs, so you don’t want people looking for business cards getting served ads for your playing cards app.
The Competitor Campaign focuses on customers searching for non-branded terms within your app’s category and the app’s function. Here, you are focusing on terms that could be used for customers searching for apps similar to ours. Our keywords and audience selection are still narrow so you still want to keep the campaign on an exact match. This is where having a campaign management platform (CMP) can help as they will have tools to help you discover those keywords and the price they are bidding on
The final campaign structure is a Discovery Campaign. Here, you are going to go to a much wider audience and parse out possible higher-quality search terms that you haven’t been able to find earlier. You will break down your keywords into two different groups: You can use a broad match on keywords that you had in the three prior campaigns with Search Match turned off and then another campaign where you aren’t using any specific keywords and have Search Match turned on. You want to separate these to make sure you can identify performance between them. Another thing you’ll want to do is utilize negative keywords more. It’s possible to have two of your own campaigns competing against one another without even realizing it. Negative keywords will ensure you aren’t competing against yourself and keep your budget under control.
Keywords and campaigns with Search Ads Maven
It’s obvious that keyword selection and campaign knowledge get complicated fast. Plus, every campaign you do will require a whole set of analytics with charts and trends to understand performance well. This is where a CMP like Search Ads Maven can make order out of that chaos. Connecting your account will enable better analytics, keyword performance, and provide industry benchmarks that will allow you to know if your ads are performing as well as they should.

